Sine on Random Vibration Tutorial
How to Run a Basic Sine on Random Vibration Test on the Panther Control System
1. Safety First
• Combined sine-on-random testing introduces both broadband random and tonal sine excitation — ensure all personnel are clear of the test area before activation.
• Inspect all sensor cables, control wiring, and mechanical fasteners. Any loose component can cause unsafe conditions during multi-frequency excitation.
• Verify the shaker and amplifier are rated for the highest expected combined acceleration levels.
• Confirm accelerometer polarity, grounding, and TEDS identification for each transducer.
• Keep Abort, Stop, and Emergency Power Off switches immediately accessible during all operations.
• Panther’s safety architecture continuously monitors over a dozen key parameters up to 25 times per second, instantly halting the test if an unsafe condition is detected.
2. System Setup
1. Power on the Panther system and amplifier, keeping the amplifier in standby until test verification is complete.
2. Launch the Panther Sine-on-Random control application on the host PC.
3. If not already connected to the hardware, navigate via the Setup→ Set Input Type menu in the Panther software to establish hardware connection.
4. Verify that all input channels are enabled, properly calibrated, and within expected voltage ranges using Panther’s automatic internal NIST-referenced digital calibration.
5. Assign the output channel connected to the shaker amplifier input and confirm polarity.
6. Open an existing Sine-on-Random test setup using the Library or create a new one. The Library feature allows quick access with file aliases for easy test management.
3. Defining the Sine-on-Random Test
1. In the Control tab, select the Sine-on-Random test type.
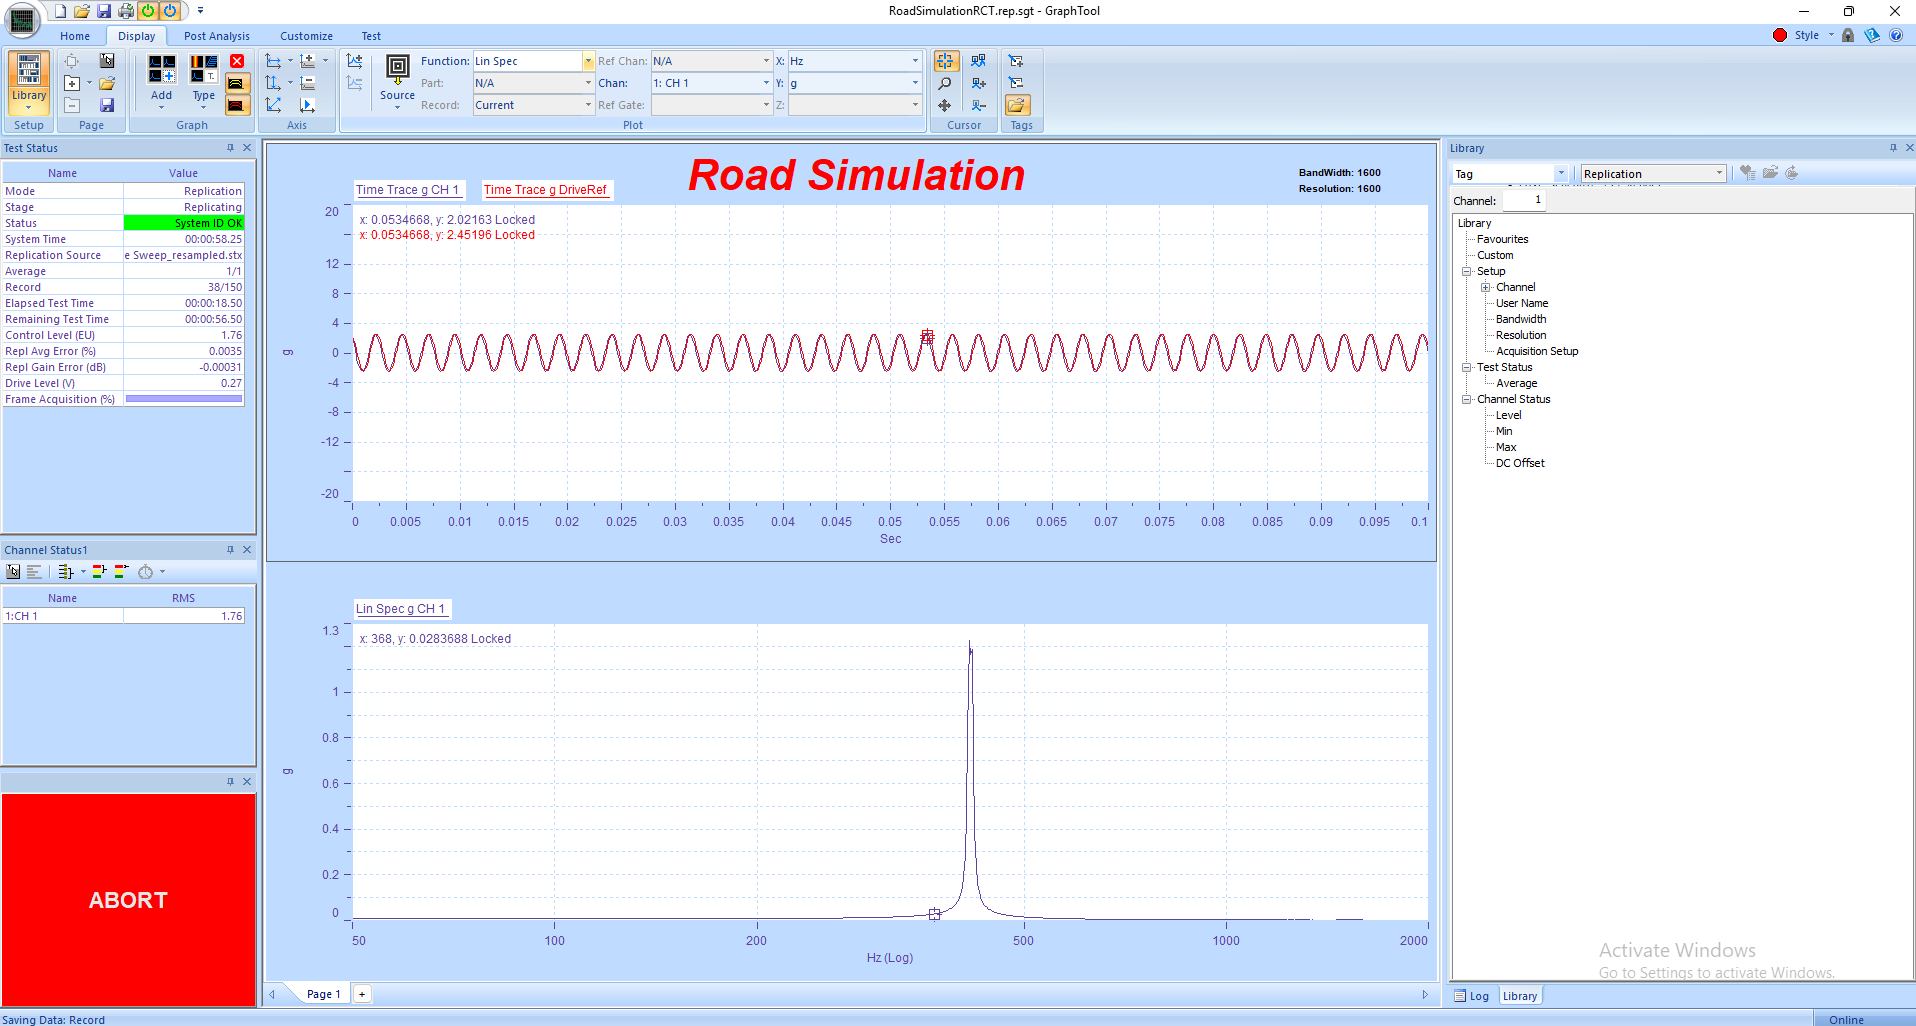
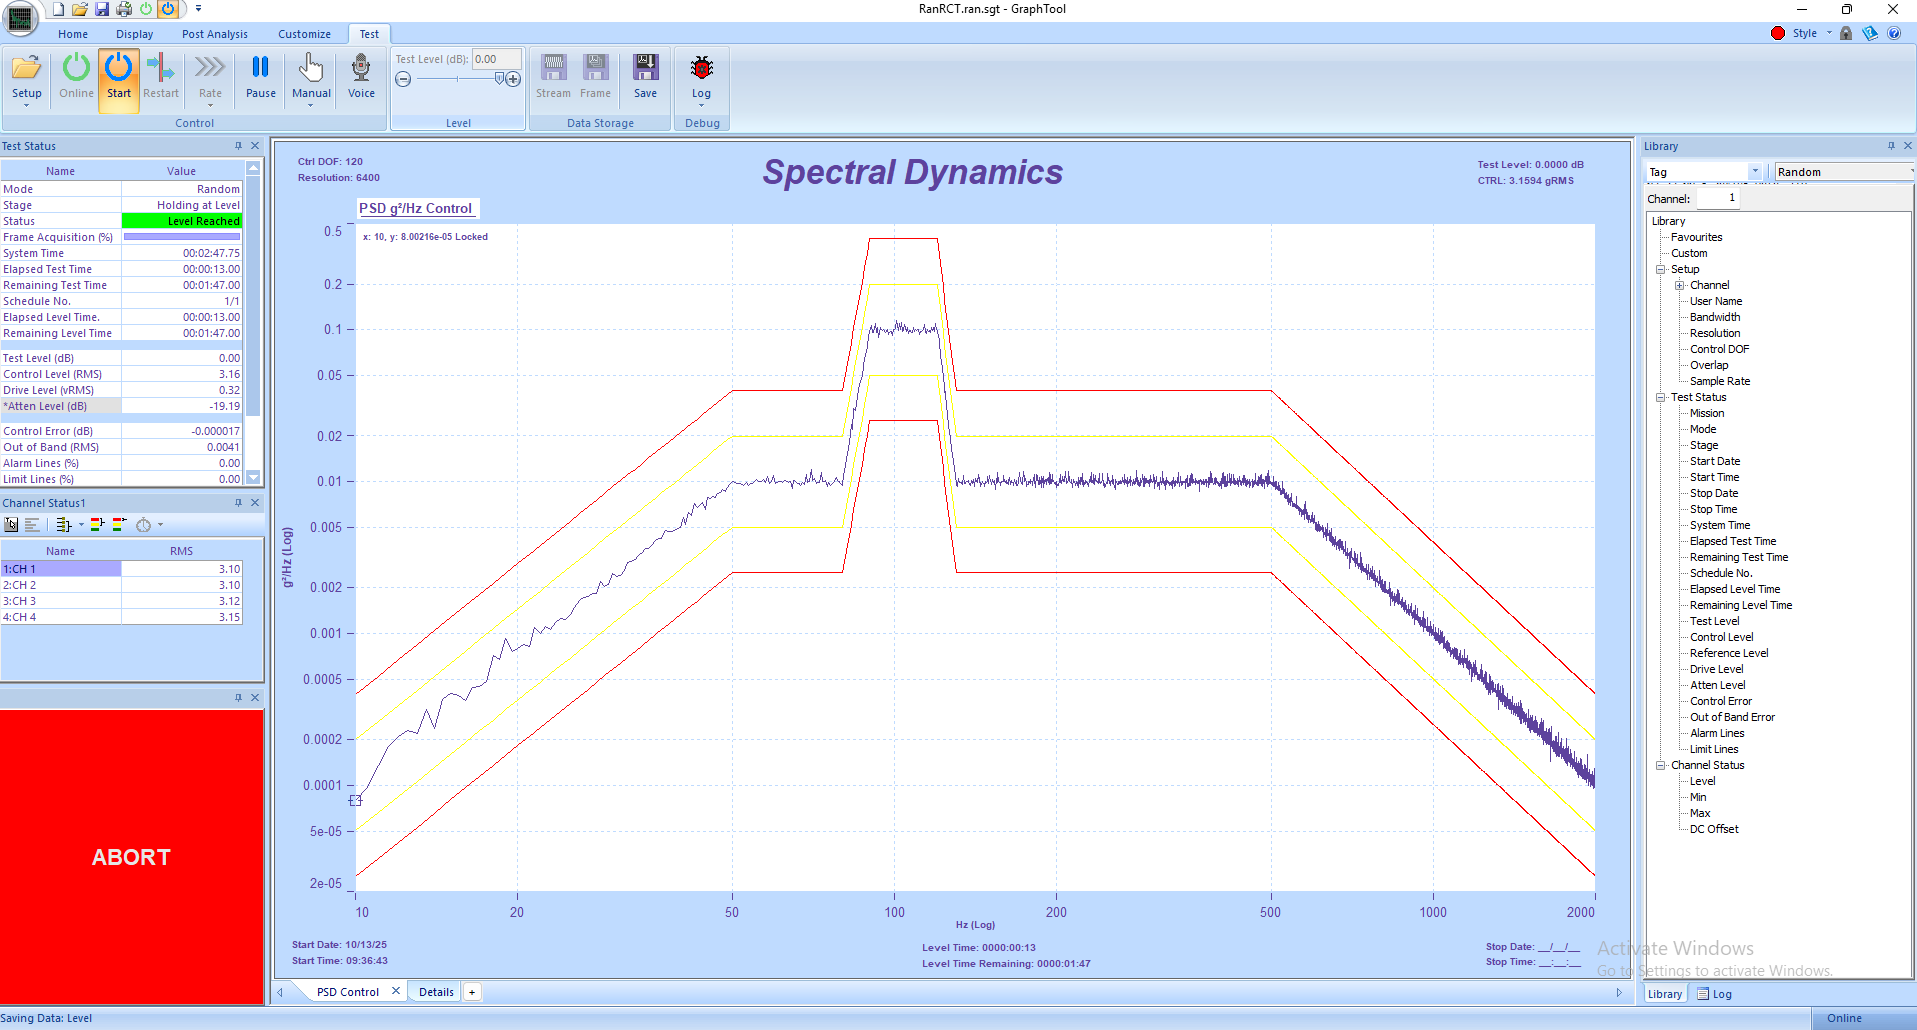
2. Define the broadband random base profile by specifying frequency range, overall level (g RMS), and spectral shape (PSD).
3. Add one or more sine tones to be superimposed on the random base. Specify frequency, amplitude, and sweep type (fixed or tracking).
4. Assign control and monitor accelerometer channels. Verify correct sensitivities and engineering units.
5. Set control tolerances, abort limits, and warning levels. Panther performs automatic pre-test verification to detect open sensors or overloads.
6. Enable adaptive control to maintain precise control of both random and sine components simultaneously.
7. For advanced operation, enable Multi-Stream Data Acquisition to capture specific channels at higher sample rates for more detailed waveform analysis.
4. Running the Test
1. Set the amplifier to ‘Operate’ mode once the system passes all pre-test safety checks.
2. Press Start in the GTX toolbar to begin. Panther performs a complete readiness check before applying drive signals.
3. During ramp-up, the system automatically balances the random and sine levels, ensuring safe, smooth transition to full amplitude.
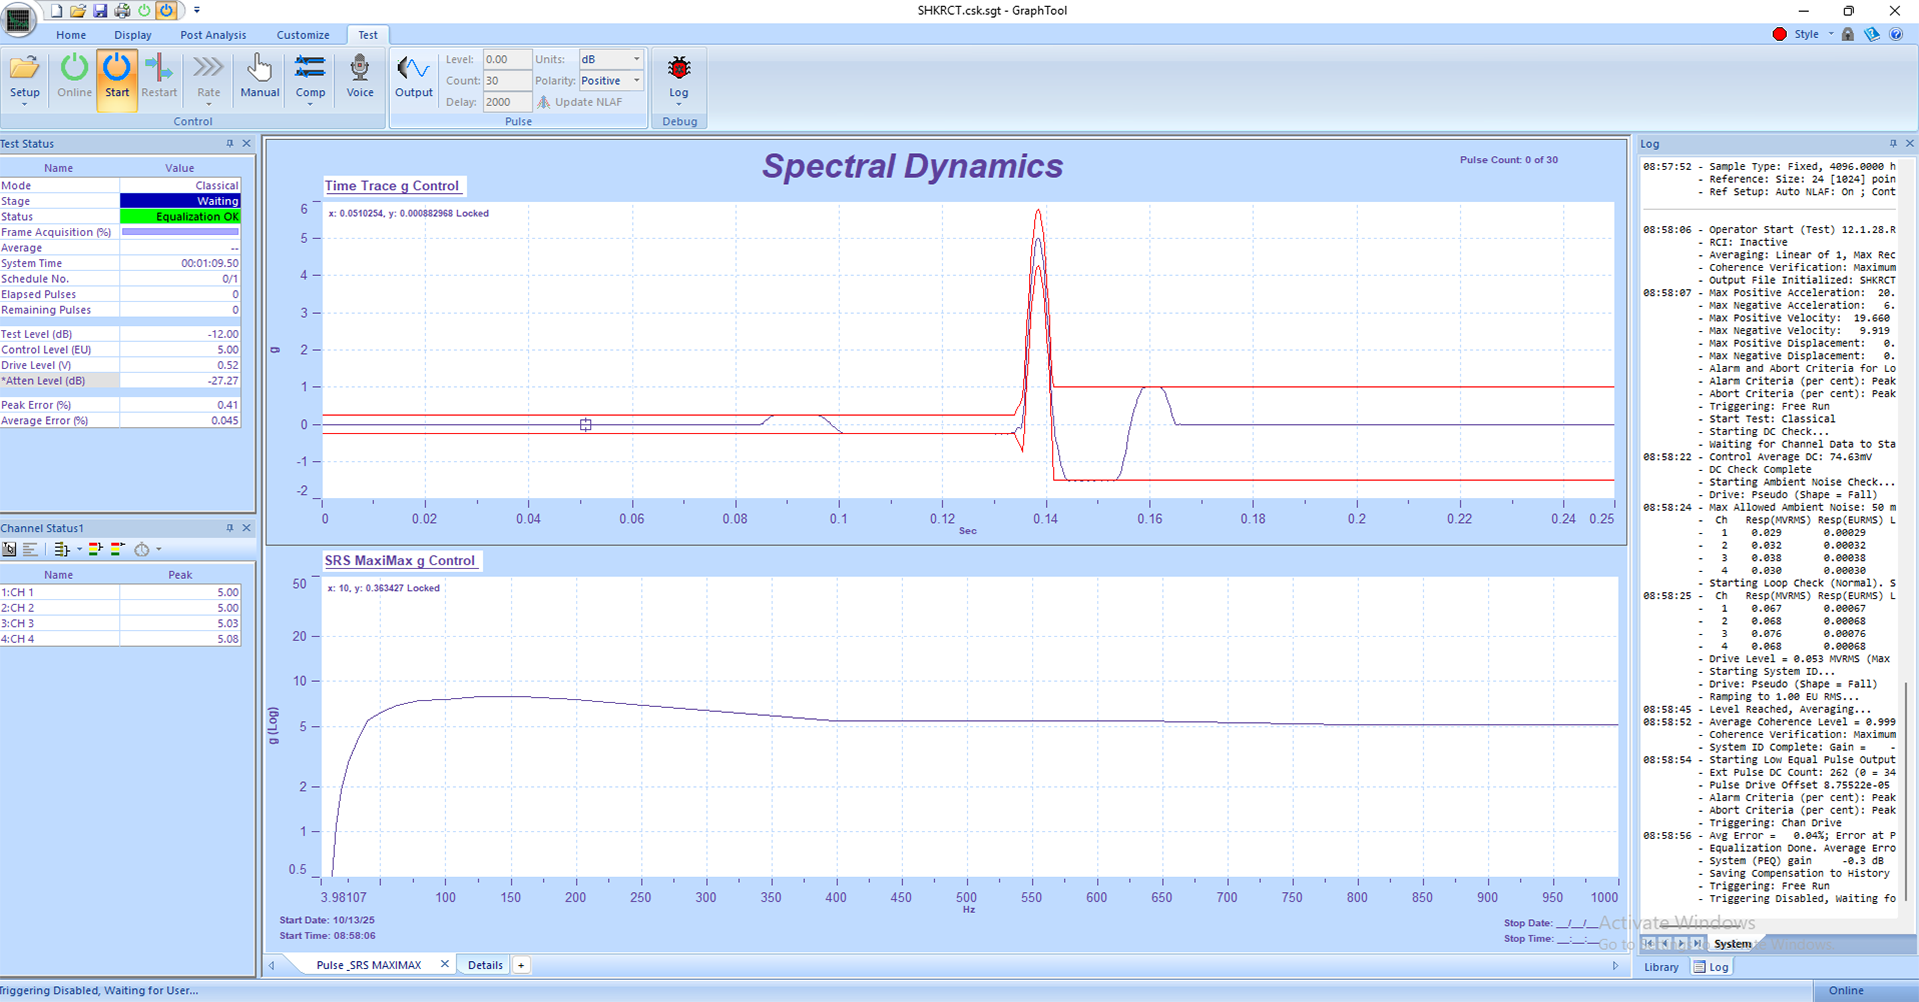
4. Monitor real-time PSD and sine tone plots within GTX. Use the Status Panels to view RMS control levels, drive voltages, and system health indicators.
5. Panther’s adaptive equalization continuously adjusts both sine and random control to maintain target values throughout the test.
6. If any limit is exceeded, Panther’s safety system automatically aborts the test. The operator can also use the Abort button in GTX at any time.
5. Data Review and Reporting
• After completion, all test data — including sine tone responses and random PSDs — are automatically stored in the Panther Library for quick access.
• Use GraphtoolX (GTX) for in-depth analysis: overlay runs, view time histories, PSDs, and harmonic response data.
• Export results directly to Word, Excel, or PDF using the Share function for streamlined reporting.
• Composite and Waterfall plots can be generated to illustrate interaction between sine tones and random background levels.
6. Panther Advantages in Sine-on-Random Testing
• Superior Safety: Monitors 12+ safety parameters up to 25 times per second for real-time protection.
• Multiple Filter Architecture: Dedicated digital filters for sine and random control enable precise simultaneous operation.
• Adaptive Control: Automatically adjusts drive signals for stable amplitude control across complex test spectra.
• Ease of Use: Touch-friendly GTX interface simplifies configuration, monitoring, and reporting.
• High Performance: 24-bit ADCs and 262 kHz sample rate ensure high-resolution signal acquisition with >110 dB dynamic range.
• Real-Time Streaming: Continuous, gap-free recording enables detailed post-test transient analysis.
• Flexible Data Access: The Library allows fast retrieval and comparison of live and historical data runs.
7. Best Practices
• Perform a low-level verification run before applying full test levels to confirm sine and random control stability.
• Ensure control accelerometer placement accurately represents the primary excitation point.
• Use Panther’s pre-test verification and abort limit setup to prevent overdrive during sine component ramp-up.
• Save custom layouts and views in GTX to maintain consistent display configuration for future tests.
• Back up calibration constants and Library files regularly to preserve data integrity.
Related Software Tutorials


![]()
![]()
![]()